Mastering Realistic Texture with Dry Media Brushes for Procreate
Digital art has come a long way from the sterile, vector-perfect lines of early graphic design software. Today, creators crave the organic imperfections that define traditional media—the grit of charcoal on rough paper, the dusty bloom of pastel, and the subtle grain of a graphite pencil. This is where Dry Media Brushes become an essential tool in your digital arsenal. Specifically, high-quality sets designed for platforms like Procreate can bridge the gap between tactile tradition and digital convenience.
However, simply downloading a brush pack does not guarantee masterful results. Many artists, from enthusiastic beginners to seasoned professionals, stumble over common pitfalls when integrating these tools into their workflow. Understanding how to properly evaluate, select, and utilize these assets is crucial for maintaining efficiency and achieving the authentic look you desire.
The Misconception of "More Is Better"
One of the most frequent mistakes artists make is assuming that a larger library equals better versatility. It is tempting to download free packs containing hundreds of generic pencils and chalks. The reality is often overwhelming clutter. When you have fifty variations of a single charcoal type, you spend more time hunting for the right tool than actually creating.
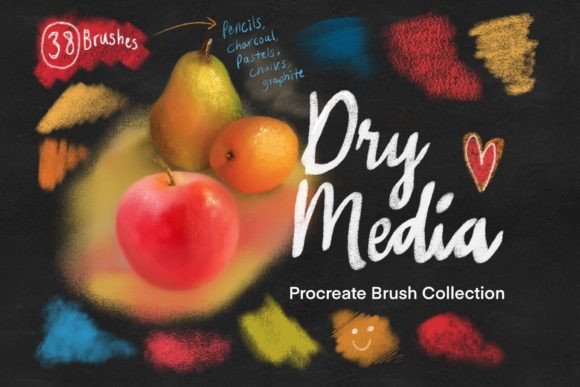
A curated approach yields far better results. Consider a specialized set, such as the one featuring 38 brushes in total. This number is not arbitrary; it represents a fine-tuned selection where every tool has a distinct purpose. By limiting your options to high-quality, differentiated tools—such as specific pencils, charcoal, chalks, conte, pastels, smudgers, dusters, base textures, and special blenders—you streamline your decision-making process. This focus allows you to learn the nuances of each stroke rather than skimming the surface of dozens of mediocre options.
Overlooking the Power of Integrated Blending
A significant oversight among digital painters is the reliance on the separate "Blend" tool found in many apps. While useful for smooth gradients, constantly switching tools breaks your creative flow and can flatten the texture you worked hard to build. High-end dry media sets address this by including special blenders within the brush library itself.
These integrated blenders are designed to mimic the action of a tortillon or a finger smudge without leaving the current brush context. For example, using a dedicated smudger brush allows you to soften edges while retaining the underlying paper grain. If you switch to a standard blur tool, you often lose that critical texture, resulting in a plastic-like finish. By utilizing brushes that blend as they paint, you maintain the integrity of the dry media aesthetic. This technique is particularly vital for portraits and realistic landscapes where subtle transitions are key.
Ignoring Paper Texture and Base Layers
Another common error is applying dry media brushes onto a pure white, smooth digital canvas. Traditional dry media relies heavily on the tooth of the paper to catch the pigment. Without this interaction, your digital charcoal may look flat and unconvincing.
To avoid this, always check if your brush set includes base textures. These are not just decorative backgrounds; they are functional layers that interact with the brush engine. A good workflow involves selecting a textured base before you begin sketching. This ensures that your pencils and pastels react realistically, breaking up solid lines and adding natural variation. If your chosen set does not include textures, you must source high-resolution paper scans separately. However, a comprehensive kit provides these assets ready-to-use, saving you hours of preparation and ensuring color consistency across your work.
Neglecting Tool Maintenance and Settings
Even the best tools fail if used incorrectly. Many users install premium brushes but never adjust the size, opacity, or flow settings to match their specific device and screen resolution. A charcoal brush that looks perfect on an iPad Pro might appear too dense or too faint on a smaller tablet if the defaults are not calibrated.
Take the time to test each brush in the set. Create a swatch sheet. Note which pencils are best for fine details and which chalks offer the broadest coverage. Understand that conte behaves differently than soft pastel; it is harder and produces sharper lines. Recognizing these material differences helps you choose the right tool for the right job. For instance, use the harder pencils for initial structural sketches and switch to softer pastels for shading and depth. This layered approach mimics traditional techniques and adds dimensional realism to your digital pieces.
Choosing Quality Over Quantity
When evaluating a purchase, look beyond the marketing images. Check for reviews that mention stability and responsiveness. A top-tier set should feel intuitive. The brushes should respond dynamically to pressure and tilt, offering a range of values from light whispers to bold, dark strokes. If a brush feels laggy or inconsistent, it will hinder your progress regardless of how realistic it looks in a preview image.
Furthermore, consider the support and updates provided by the creator. Digital platforms update frequently, and brush engines can change. A reputable developer ensures their tools remain compatible with the latest software versions. Investing in a well-maintained set protects your workflow from future disruptions.
Practical Steps for Implementation
To get the most out of your new toolkit, follow these practical steps:
- Start Simple: Begin with just three tools—a pencil, a charcoal, and a blender. Master their interaction before introducing pastels and conte.
- Layer Wisely: Use separate layers for sketching, shading, and texturing. This non-destructive approach allows you to adjust opacity and blending modes later.
- Experiment with Opacity: Dry media builds up gradually. Keep your brush opacity lower than you think necessary to allow for gradual buildup and easier correction.
- Utilize Dusters: Do not ignore the duster brushes. They are excellent for adding atmospheric effects, cleaning up edges, or creating soft highlights without erasing.
In conclusion, Dry Media Brushes offer a powerful way to bring warmth and authenticity to digital art. By avoiding the trap of excessive choice, leveraging integrated blending tools, respecting the importance of texture, and understanding the unique properties of each medium, you can elevate your work significantly. Remember, the tool is only as good as the hand that wields it. Take the time to learn the nuances of your 38-brush set, and you will find that your digital creations possess the soul and depth of traditional masterpieces.