Mastering Nature Illustrations with 10 Leafy Procreate Brushes
Digital illustration often demands a delicate balance between artistic vision and technical efficiency. For artists working in Procreate, the pressure to produce detailed, organic backgrounds can quickly lead to burnout or repetitive strain injuries. This is where specialized toolsets become essential rather than optional. The 10 Leafy Procreate Brushes set offers a streamlined solution for adding depth and natural elements to your work without the tedious process of drawing every individual leaf. However, simply purchasing a brush pack does not guarantee mastery. Many creators overlook the specific mechanics and best practices required to get the most out of these tools, leading to flat, unrealistic results.
Understanding the Dual-Brush System
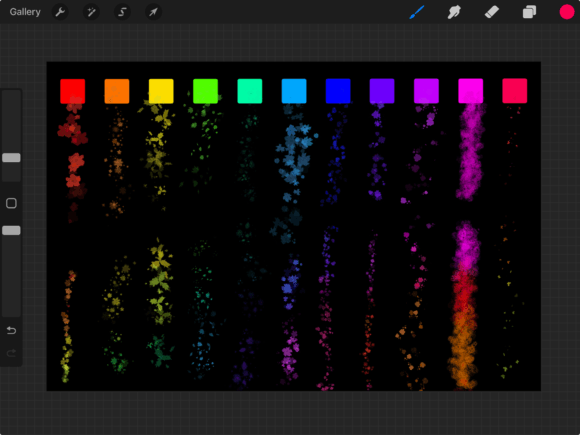
Before diving into technique, it is crucial to understand exactly what you are working with. This set includes ten standard brushes designed for immediate use, but its true power lies in the accompanying color-changing variants. These are not merely duplicate stamps; they are dynamic tools engineered to respond to physical input. The color-changing feature works exclusively with an Apple Pencil within the Procreate ecosystem. By applying more pressure during a single brush stroke, you trigger a shift in hue or saturation. This allows for complex, multi-tonal foliage in one fluid motion, mimicking the way light hits real leaves.
A common misunderstanding among beginners is treating these variants as static stamps. If you tap lightly without varying your pressure, you miss the core benefit of the tool. The result is a uniform, artificial look that lacks the organic variation found in nature. To avoid this, practice controlling your stylus pressure on a blank canvas before starting a project. Learn the threshold where the color shifts occur so you can predict the outcome of your strokes.
Avoiding the "Sticker" Effect
One of the most frequent mistakes artists make when using leaf brushes is creating what is known as the "sticker effect." This happens when leaves are placed randomly without regard for perspective, lighting, or growth patterns. The artwork ends up looking like a collage of cut-outs rather than a cohesive scene. This issue severely impacts the perceived quality of your piece, making it appear amateurish despite the high quality of the brushes themselves.
To correct this, always consider the direction of your light source. Even though the brush handles some color variation via pressure, you must still manually adjust the layer opacity or use blending modes to integrate the leaves into the scene. Use the standard brushes for base shapes and the color-changing variants for highlights and depth. Layering is key; start with larger, darker shapes in the background and move to smaller, brighter details in the foreground. This creates a sense of atmospheric perspective that static stamping cannot achieve.
Hardware Limitations and Compatibility Checks
It is vital to verify your hardware compatibility before relying on these tools for client work or serious projects. As noted, the advanced color-shifting functionality requires an Apple Pencil. Artists attempting to use their fingers or third-party styluses will find that the pressure sensitivity needed for the color change does not register correctly. This limitation can lead to frustration if not anticipated. If you do not own an Apple Pencil, you can still use the ten standard brushes effectively, but you will need to manually paint in color variations, which increases production time.
Additionally, ensure your iPad model supports the necessary pressure levels. Older generations may have less nuanced pressure sensitivity, resulting in abrupt color jumps rather than smooth gradients. Testing your device with a simple stroke test can save hours of troubleshooting later. If the transition feels jerky, adjust the brush settings in Procreate’s Brush Studio, specifically looking at the Pressure curve under the Dynamics section.
Efficiency vs. Artistic Integrity
While these brushes are designed to save time, over-reliance can harm your artistic development. A common pitfall is using the brushes to fill entire canvases without any underlying structure. This leads to chaotic compositions that lack focal points. The brushes are tools for enhancement, not replacements for composition skills. Use them to add texture to bushes, create dense flower fields, or simulate falling leaves, but always anchor them with solid sketching and planning.
For example, when creating a bush, do not just stamp leaves randomly. Sketch the overall volume of the bush first. Then, use the brushes to define the edges where light hits. Use the color-changing variant to add subtle shifts from shadow to highlight within the same stroke. This approach maintains efficiency while preserving artistic integrity. It ensures that the final piece looks hand-crafted rather than generated by a plugin.
Practical Application Tips
- Vary Your Stroke Direction: Leaves grow in specific patterns. Avoid stamping them all in the same orientation. Rotate your canvas frequently to match the natural flow of the plant you are depicting.
- Use Clipping Masks: To keep your workflow non-destructive, place your leaf layers above a base shape layer and enable Clipping Mask. This allows you to paint freely without worrying about going outside the lines of your bush or tree.
- Adjust Opacity for Depth: Not every leaf needs to be fully opaque. Lower the opacity of background leaves to push them back visually, creating a sense of depth and airiness.
- Combine with Textures: Overlay a subtle paper or noise texture on top of your leaf layers to unify the digital elements and reduce the "too clean" look that often plagues digital art.
Making the Right Choice for Your Workflow
When evaluating whether 10 Leafy Procreate Brushes fits your needs, consider your current project types. If you frequently illustrate botanical subjects, children’s books, or environmental concept art, this set is a high-value addition. However, if your work is primarily geometric or abstract, the utility may be limited. Always check the license terms if you plan to use assets created with these brushes for commercial products. Most brush creators allow commercial use of the artwork, but reselling the brushes themselves is prohibited.
Remember that the goal of these tools is to enhance your creativity, not restrict it. By understanding the mechanics of the pressure-sensitive color changes and avoiding common compositional errors, you can transform your workflow. The result is richer, more dynamic nature scenes that captivate viewers without consuming excessive hours of manual detailing. Take the time to experiment with the pressure thresholds and layering techniques, and you will find that these brushes become an indispensable part of your digital toolkit.