Mastering Procreate Pencil Brushes for Digital Art
Digital illustration has evolved far beyond the sterile, perfect lines of early vector graphics. Today, artists crave texture, imperfection, and the tactile warmth of traditional media. This is where Procreate Pencil Brushes transform the iPad from a sleek tablet into a versatile sketchbook. For creators ranging from hobbyists to professional designers, these tools bridge the gap between analog charm and digital efficiency. By leveraging a specialized set of colored pencil brushes, you can achieve depth and realism that standard digital tools often miss.
The Appeal of Digital Graphite and Color
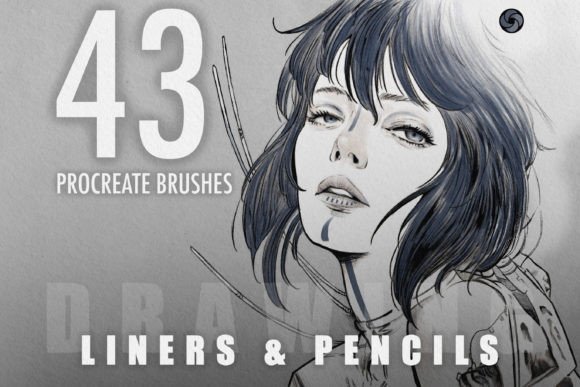
Traditional pencils offer a unique sensory experience—the scratch of graphite on paper, the subtle grain of wood pulp, and the way pigment builds up in layers. Replicating this digitally requires more than just a round brush with low opacity. High-quality Procreate Pencil Brushes are engineered to mimic the physical behavior of real drawing instruments. They respond dynamically to the tilt and pressure of your Apple Pencil, allowing for nuanced shading and textured strokes that feel organic rather than computed.
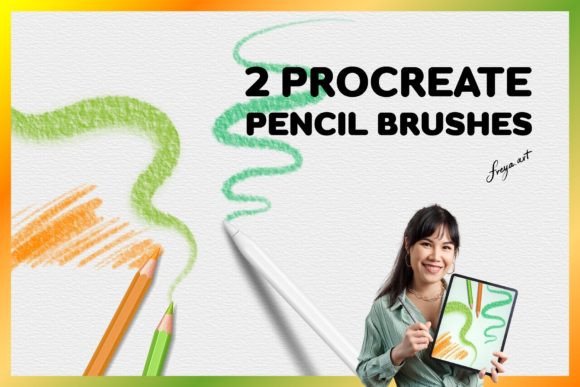
When you use a dedicated set, such as a bundle including two distinct colored pencil styles plus a paper texture overlay, you gain immediate access to a cohesive workflow. The inclusion of a paper texture is particularly vital. It breaks up the uniformity of the digital canvas, providing "tooth" for the pigment to catch. This small detail makes the difference between a flat digital image and a piece that looks like it was drawn by hand on high-quality stock.
Practical Applications for Diverse Creators
The versatility of these brushes extends well beyond fine art. Different professionals can adapt these tools to meet specific project goals:
- Graphic Designers and Marketers: Use colored pencils to add a human touch to corporate presentations or social media graphics. A hand-drawn diagram or annotated screenshot feels more approachable and less rigid than standard typography.
- Educators and Coaches: Create engaging worksheets, explainer videos, or digital notes. The informal aesthetic of pencil sketches helps lower cognitive load for students, making complex ideas feel easier to digest.
- Fashion and Interior Designers: Rapidly iterate on concepts. Colored pencils are ideal for rendering fabrics, wood grains, and lighting effects without getting bogged down in hyper-realistic detailing too early in the process.
- Authors and Publishers: Illustrate book covers, chapter headers, or internal decorations. The nostalgic quality of pencil art evokes emotion and fits well with genres like memoir, historical fiction, or children’s literature.
Techniques for Realistic Results
To get the most out of your Procreate Pencil Brushes, you must understand how they interact with the software. Since these brushes rely heavily on pressure sensitivity, using an Apple Pencil is not just recommended—it is essential. Without precise pressure data, the brushes cannot replicate the variation between a light sketch line and a dark, saturated stroke.
Layering and Blending
Real colored pencils work through layering. Start with a light base color on a separate layer. Use the second brush in your set—perhaps one with a softer core or different grain—to build up shadows. Avoid using the smudge tool excessively; instead, let the natural transparency of the brush do the work. Overlap your strokes in cross-hatching patterns to create rich, deep tones. This method preserves the texture of the underlying paper layer, maintaining the authentic look.
Utilizing the Paper Texture
The bonus paper texture included in many brush sets should be placed on the topmost layer of your document. Set the layer mode to Multiply or Overlay, depending on the desired intensity. This global texture unifies all your drawing layers, ensuring that even if you switch colors or brushes, the entire piece shares the same physical substrate appearance. It prevents the "digital collage" look where elements seem to float separately.
Workflow Tips for Consistency
Consistency is key when creating series of illustrations or maintaining a brand aesthetic. Here are practical steps to keep your work organized and effective:
- Define Your Palette: Before starting, select a limited color palette. Colored pencils shine when colors are mixed optically on the canvas rather than using hundreds of distinct hues. Stick to 3–5 core colors and vary their pressure to create tints and shades.
- Standardize Canvas Settings: Always work at a high resolution (300 DPI) to ensure the texture details remain crisp. If you plan to print your work, this step is non-negotiable.
- Use Clipping Masks: When adding color to a specific shape, create a new layer above your sketch and clip it. This allows you to experiment with different pencil textures and colors without worrying about staying inside the lines manually.
- Save Brush Presets: If you tweak the size or opacity of your Procreate Pencil Brushes for a specific project, save those settings as a new preset. This ensures you can return to the exact same look for future pieces.
Overcoming Common Digital Challenges
One common issue artists face is the "plastic" look of digital art. This usually happens when strokes are too uniform. To combat this, rotate your canvas frequently while drawing. Just as you would turn a physical sketchbook to find a comfortable angle for your hand, rotating the iPad changes the direction of your stroke relative to the screen grid, creating more natural line variation.
Another challenge is over-blending. In traditional media, you can only blend so much before the paper fibers break down. In Procreate, it is easy to smooth everything into a muddy mess. Resist the urge to perfect every transition. Leave some visible stroke marks and grain. These imperfections signal to the viewer that a human created the image, adding value and authenticity.
Expanding Your Creative Horizon
Once you master the basics, experiment with combining these pencils with other media. Use a watercolor brush for the background washes and let the Procreate Pencil Brushes define the foreground details. This mixed-media approach adds depth and visual interest. You might also try using the pencils for typography. Hand-lettered quotes rendered in textured colored pencil style perform exceptionally well on platforms like Instagram and Pinterest, where users scroll quickly and stop for visually warm, inviting content.
Remember, the tool is only as good as the intent behind it. Whether you are designing a logo concept, illustrating a children's book, or simply journaling your daily thoughts, these brushes provide the freedom to explore. They remove the fear of making permanent mistakes, allowing you to undo, adjust, and refine until the vision matches the execution.
By integrating these specialized tools into your routine, you elevate your digital artwork from simple drawings to textured, emotive pieces. The instant download nature of these assets means you can start creating immediately, turning inspiration into action without delay. Embrace the grain, respect the pressure, and let your digital pencil dance across the virtual paper.